

How to move a vending machine: 7 critical steps, best tips
Planning, equipment, stairs, transport and reinstallation: how to relocate a heavy machine without damage or injury.
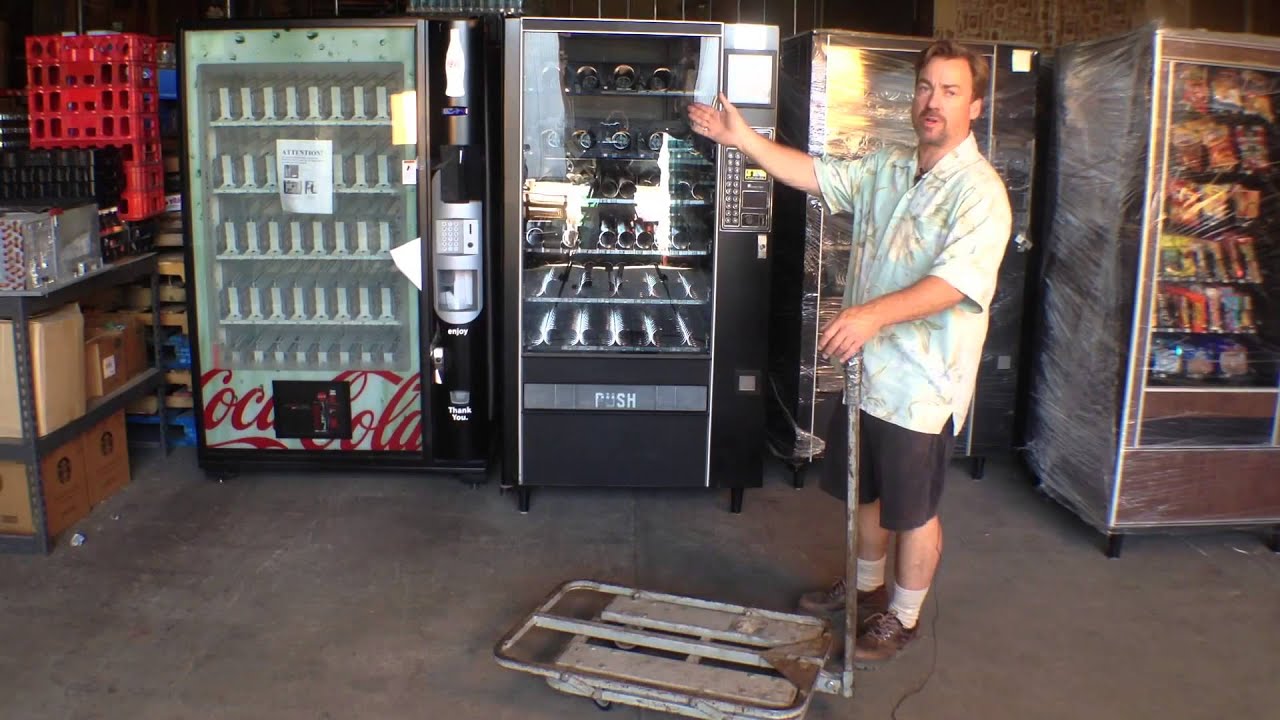
Knowing how to move a vending machine safely saves money, protects the machine and prevents injuries. These machines are heavy, top-heavy and full of delicate parts, so a careless move can be costly.
This guide covers 7 critical steps to move a vending machine safely: planning the route, emptying and securing it, choosing equipment, handling stairs, transporting it and reinstalling it at the new site.
Free delivery and installation
New Irelley machines are delivered and installed free anywhere in the UK within 24 hours.
See Delivery and Installation →Why you must move a vending machine with care
Before you move a vending machine, remember that full-size machines often weigh several hundred kilograms, and most of that weight sits high up. That makes them easy to tip and hard to stop once they start falling.
Inside are glass fronts, spirals, electronics and, in chilled machines, a refrigeration system. Rough handling can damage any of them.
The law also matters. The HSE’s guidance on manual handling at work says employers should avoid hazardous manual handling where possible and use suitable equipment where it can’t be avoided.
When you might need to move one
There are many reasons to move a vending machine. A site may be refurbishing, a machine may be underperforming, or a business may be relocating to new premises.
Operators often move a vending machine to a better location after reviewing sales data. A machine that sits idle in a quiet corridor can earn far more near a busy break room.
Whatever the reason, the same safety principles apply to every move.
7 critical steps to move a vending machine
Follow these steps every time you move a vending machine, whether across a room or across the country.
1. Plan the route
Before you move a vending machine, measure it and every doorway, corridor, lift and turn on the way. Check floor surfaces, steps and slopes, and clear obstacles before you start.
2. Empty the machine
Remove all products, cash and coins. A full machine is much heavier, and loose stock can damage spirals and glass in transit.
3. Secure loose parts
Tape or remove shelves, spirals and trays that could move. Lock the door and keep the keys safe and separate.
4. Disconnect safely
Switch off and unplug the machine, and disconnect any card reader cables or external antennas. Coil and secure the power lead so nobody trips over it.
5. Use the right equipment
An appliance trolley, pallet truck or specialist vending dolly makes the job safer. Use straps to secure the machine firmly to the trolley.
6. Keep it upright
Refrigerated machines should stay as upright as possible. Tilting can affect the refrigeration system and the cabinet.
7. Let it settle before switching on
After a move, refrigerated machines are often left upright for several hours before switching on. Follow the manufacturer’s guidance for your model.
“Never rush to move a vending machine. Ten minutes of planning saves a cracked front, a damaged floor or a trip to A&E.”
Planning the timing
Choose a quiet time to move a vending machine. Early mornings, evenings or weekends usually mean fewer people in corridors and lifts.
Tell the site owner and staff in advance, and put up a notice if the machine will be out of action. Customers appreciate knowing when it will be back.
Plan the whole sequence, from emptying to settling and restocking, so the machine is back in service as quickly as possible. Cashless machines with telemetry make it easy to confirm everything is working once it’s back online, as our contactless vending machine guide explains.
Equipment to move a vending machine
The right kit makes it far safer to move a vending machine, even over short distances:
- Appliance trolley or vending dolly: designed for tall, heavy cabinets
- Pallet truck: useful on flat, smooth floors
- Ratchet straps: to secure the machine to the trolley and in the van
- Floor protection: boards or mats to protect floors
- Moving blankets: to protect the glass and panels
- A van with a tail lift: for transport between sites
Gloves, safety footwear and high-visibility vests help protect the team. Never try to carry a machine by hand.
Moving within the same building
Even when you move a vending machine a short distance, it needs planning. A move across a room still means emptying it, securing parts and using a trolley.
Check the floor for slopes, thresholds and cables, and protect delicate surfaces. Short moves are where people are most tempted to cut corners, and where accidents often happen.
Protecting floors and walls
A heavy machine can scratch, dent or crack floors and scuff walls. Lay boards or protective mats along the route before you move a vending machine.
Pad door frames and corners with blankets, and watch for low ceilings and light fittings. Damage to the building can cost more than the move itself, and it won’t impress the site owner.
Pay special attention to polished floors, carpets and lift interiors. Taking a few extra minutes to protect them makes it much easier to move a vending machine without complaints.
Stairs, lifts and tight spaces
Stairs are the riskiest part of any attempt to move a vending machine. A machine that slips on stairs can cause serious injuries and major damage.
For stairs, use specialist movers with stair-climbing equipment. Check that any lift can take the machine’s weight and size, and that the floor outside the lift is level, before you move a vending machine into it.
Tight corners and narrow corridors need careful planning. Sometimes removing a door from its hinges gives the extra space needed.
Option 1
Professional Movers
- Equipment: Specialist trolleys and stair climbers
- Experience: Trained teams
- Insurance: Usually included
- Risk: Lower
- Best for: Stairs, long distances and tight spaces
Option 2
Do It Yourself
- Equipment: Hired trolley and straps
- Experience: Varies
- Insurance: Check your cover
- Risk: Higher
- Best for: Short, flat moves only
What a move costs
The cost to move a vending machine depends on distance, access and the number of people needed. A short, flat move within a building costs far less than a move involving stairs and a long drive.
Specialist movers usually price by the job, taking into account equipment, crew and travel. Get a written quote that includes insurance in transit.
Factor the cost of downtime too. A machine that’s off for days loses sales, so plan the move to keep that gap short.
Choosing a moving company
If you hire professionals to move a vending machine, choose a company with experience of heavy equipment. General removal firms don’t always have the right trolleys or stair climbers.
Ask about insurance, the equipment they’ll bring and how many people will attend. A good firm will ask detailed questions about access before quoting.
Check reviews and ask whether they’ve moved vending machines before. Experience matters when you move a vending machine through tight spaces.
Moving in bad weather
Rain, ice and wind make it harder to move a vending machine safely. Wet ramps and tail lifts become slippery, and electronics can be damaged by water.
Cover the machine with waterproof sheeting during outdoor stages, and postpone the move if conditions are icy. A day’s delay is better than a damaged machine or an injury.
Insurance and liability
Before you move a vending machine, check who is liable if something goes wrong. Damage to the machine, the building or a person can be expensive.
Professional movers usually carry goods-in-transit and public liability insurance. If you’re doing it yourself, check that your own policy covers the machine during the move.
Site owners may also have rules about contractors working on their premises. Ask before the move day so there are no surprises. Our vending machine insurance guide explains the main types of cover.
Transporting between sites
When you move a vending machine by road, use a van with a tail lift and enough height to keep the machine upright. Strap it to the van’s tie points so it can’t slide or tip.
Protect the front with blankets and keep the door locked. Drive gently, especially around corners, roundabouts and over speed bumps.
Check your insurance covers the machine in transit. Our guide to vending machine insurance explains what to look for.
Preparing the new site
Before you move a vending machine, make sure the new spot is ready. It needs a suitable power socket, a level floor and space around the machine for ventilation.
Check mobile signal for the card reader, and confirm that the site owner is happy with the exact position. Our guides to vending machine locations and vending machine electricity costs help you plan.
A ready site means the machine can be positioned, levelled and settled without delay.
Documenting the move
Take photos of the machine before and after you move a vending machine. They’re useful if there’s an insurance claim or a dispute about damage.
Note the meter readings, cash in the machine and any existing faults. A simple record protects you, the site owner and the mover.
Reinstalling at the new site
Once you move a vending machine to its new site, place it on a firm, level floor with space around it for ventilation. Level it using the adjustable feet.
Leave a refrigerated machine upright for the recommended time, then switch on and let it reach temperature before loading stock. Reconnect the card reader and test a payment.
Anchor the machine if the site requires it, and check that the door opens fully. Our guide to vending machine locations covers good placement.
Our take: empty it, secure it, keep it upright and use proper equipment. For stairs or long distances, pay for specialist movers rather than risking the machine and your team.
Different machine types
How you move a vending machine depends on its type.
Snack machines
Snack machines are usually lighter than drinks machines, but glass fronts and spirals still need protecting. Our classic snack machine is a typical example.
Drinks and combo machines
These are heavier and refrigerated, so keep them upright and allow settling time. Combos like our black combo machine combine both sets of needs.
Coffee machines
Empty water tanks, canisters and waste bins before you move a vending machine of this type. Our Nescafé hot drinks machine and similar models may also need draining.
Freezer machines
Ice cream and frozen machines need to be emptied completely and allowed to defrost safely before moving, then given time to settle and reach temperature afterwards.
Moving a refrigerated machine
When you move a vending machine with a fridge, such as a drinks or combo machine, take extra care. Keep them upright throughout, avoid sharp bumps and allow settling time before switching on.
If a machine has been laid down or tilted heavily, tell your engineer before switching it on. They can advise whether extra checks are needed.
Keeping your team safe
People get hurt when they try to move a vending machine by hand. Never lift or carry it, and never stand on the downhill side of a machine on a slope.
Brief the team before starting, agree who leads and use clear signals. Stop immediately if anything feels unstable.
After the move
For the first week after you move a vending machine, check it more often. Watch temperatures, test payments and look for any new noises or leaks.
Restock gradually so the fridge can cope, and make sure every column vends correctly. Our guides to restocking a vending machine and vending machine maintenance cover these checks.
Temporary moves for events
Some operators move a vending machine to an event for a few days, such as a festival or sports tournament. The same steps apply, but plan power, shelter and security at the event site carefully.
Allow time for settling and cooling before the event opens, and plan the return move as carefully as the first.
For vending operators
Operators move machines more often than most owners. Building a safe, repeatable process to move a vending machine protects your team and your equipment.
Check your placement agreement before removing a machine, as some include notice periods. Our guides to placement agreements and vending machine contracts explain what to look for.
When moving to a new site, our vending machine pitch guide helps you secure the next location before the move.
Pre-move checklist
Run through this checklist before you move a vending machine:
- Route measured, cleared and checked for stairs and slopes
- Machine emptied of stock, cash and coins
- Shelves, spirals and loose parts secured
- Power and card reader disconnected
- Trolley, straps, floor protection and blankets ready
- Enough people, with a clear lead
- New site prepared with power, level floor and signal
Ticking every box makes it far easier to move a vending machine without damage or injury.
Common mistakes
The biggest mistake is trying to move a vending machine without the right equipment. Machines tip easily, and people get hurt.
The second is trying to move a vending machine full of stock. It adds weight and causes damage inside.
The third is switching on a refrigerated machine straight after a move. Patience protects the compressor.
The last is skipping the route check, only to find the machine won’t fit through a door halfway through the move.
New machines from Irelley
If you’re buying a new machine, you won’t need to move a vending machine yourself. Irelley delivers and installs free anywhere in the UK within 24 hours, as explained on our delivery and installation page.
Browse our vending machines for sale, or contact our team for advice about moving an existing machine.
FAQ
Frequently asked questions
Full-size vending machines often weigh several hundred kilograms, and drinks machines are usually heavier than snack machines. Always check the manufacturer’s weight before planning a move.
At least two or three people with proper equipment, such as an appliance trolley or pallet truck. Stairs and tight spaces usually call for professional movers.
It’s best not to. Refrigerated machines should be kept upright, and if one has been tilted, it should stand upright for a period before switching on, as the manufacturer advises.
Follow the manufacturer’s guidance. Refrigerated machines are often left upright for several hours after a move so the compressor oil can settle.
Irelley delivers and installs new machines free anywhere in the UK within 24 hours. For moving an existing machine, contact our team for advice or use specialist movers.
Delivered and installed for you
New machines delivered and installed free anywhere in the UK within 24 hours.